
Roasting a chicken in a Dutch oven, as demonstrated by the Pioneer Woman herself, Ree Drummond, is a timeless and delicious method that results in a succulent, flavorful bird with crispy skin. Ree Drummond is known for her down-to-earth and approachable cooking style, making her recipes accessible to home cooks of all levels. This article will walk you through roasting a chicken in a Dutch oven, following the Pioneer Woman’s techniques, and adding some additional tips and insights.
The Pioneer Woman: Pioneer Woman, or Ree Drummond, is a well-known food blogger, author, and TV personality. She is best known for her wholesome and rustic cooking style, often featuring recipes perfect for family gatherings and comfort food.
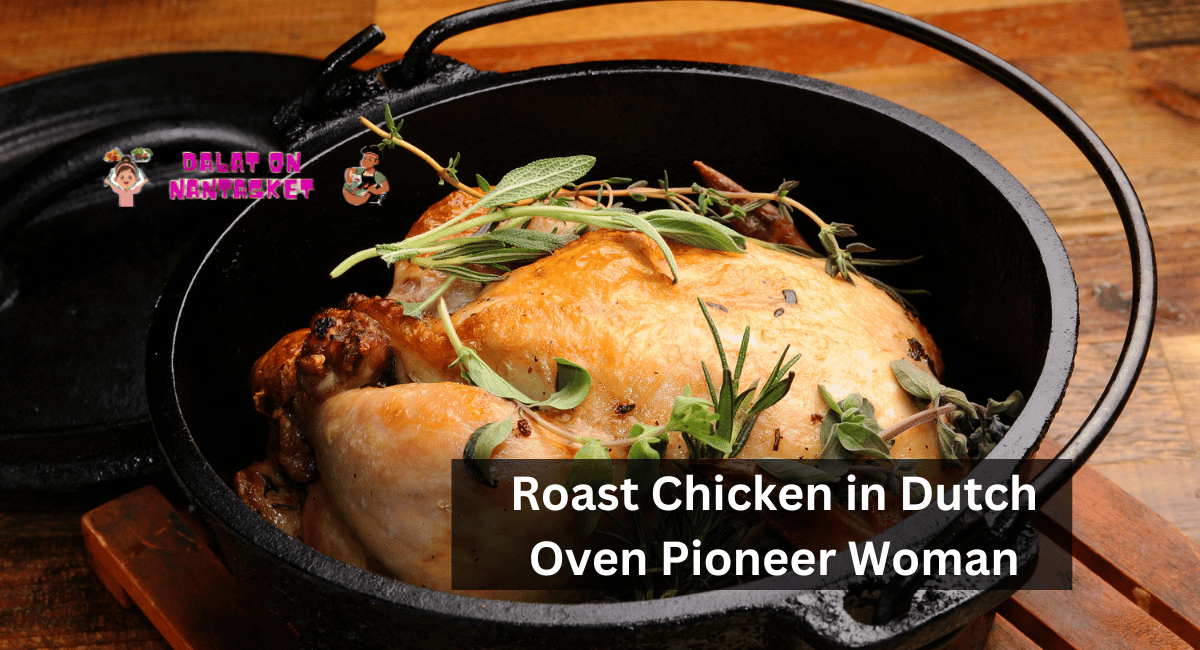
The Dutch Oven: A cast-iron or ceramic pot with a tight-fitting lid, the Dutch oven is a valuable culinary utensil. It’s excellent for slow cooking, braising, frying, and baking. Its thick walls and ability to evenly distribute heat make it perfect for roasting a chicken.
Why Roast a Chicken in a Dutch Oven?: Roasting a chicken in a Dutch oven offers several advantages. The Dutch oven’s even heat distribution ensures that the chicken cooks uniformly, resulting in juicy meat and crispy skin. It also retains moisture, making it difficult for the Chicken to dry out during cooking. The Dutch oven’s tight-fitting lid also helps lock in flavors and aromas.
1. Ingredients
Before you begin roasting your Chicken, gather all the necessary ingredients:
- Whole Chicken: To get the finest flavor and texture, use a high-quality chicken, ideally one that was raised in an organic or free-range environment.
- Butter: Unsalted butter is commonly used to rub over the Chicken’s skin for a rich and flavorful crust.
- Salt and Pepper: These are essential seasonings for the Chicken.
- Fresh Herbs (optional): Rosemary, thyme, or sage are popular choices to infuse the Chicken with additional flavor.
- Aromatics (optional): Garlic cloves, onions, lemons, or any other aromatics you prefer to stuff inside the chicken cavity for extra taste.
2. Preparation
Preheat Your Oven: To begin, preheat the oven to 350F (175C). Make sure your oven is properly preheated before you begin cooking for the best results.
Wash and Pat Dry the Chicken: Remove the Chicken from its packaging and rinse it thoroughly under cold running water. Dry the Chicken thoroughly, inside and out, using paper towels. This is crucial for getting a nice, crisp outside.
Season the Chicken:
- Salt and pepper the chicken thoroughly on both the interior and the outside.
- If you’re using fresh herbs, chop them finely and mix them with softened butter.
- Rub the herbed butter all over the Chicken’s skin.
Trussing the Chicken (optional): Trussing is the process of tying the Chicken’s legs together with kitchen twine to help it cook evenly and maintain its shape. While it’s not mandatory, it can be helpful.
Adding Aromatics (optional): If you want to infuse your Chicken with additional flavors, stuff the cavity with aromatics like garlic cloves, onions, or lemon halves. Although not required, doing so may improve the flavor of the Chicken.
3. Cooking Process
Searing the Chicken: Put the Dutch oven in the middle of the stove and turn the heat to medium. The bottom of a Dutch oven can be kept clean by using a small amount of cooking oil. Once the oil is hot, carefully place the seasoned chicken breast side down in the Dutch oven. Sear the Chicken for 3-5 minutes until the skin turns golden brown and crispy. Use tongs to flip the Chicken and sear the other side for an additional 3-5 minutes.
Braising the Chicken: Take the Chicken out of the Dutch oven once it has been seared. If there is excess oil, you can pour it off, leaving just a thin layer. Return the Chicken to the Dutch oven, cover it with the lid, and place it in the preheated oven.
Basting (optional): Basting involves spooning the juices or melted butter over the Chicken during cooking to keep it moist and flavorful. You can choose to bake the Chicken every 30 minutes if desired.
Checking for Doneness: The cooking time will depend on the size of your Chicken, but a general guideline is 20 minutes per pound (450g) of Chicken. To see if the Chicken is done, stick a meat thermometer into the thickest part without hitting the bone. The temperature inside should be at least 165°F (74°C). If you want an accurate temperature reading, keep the thermometer away from the bone.
Resting the Chicken: Remove the Chicken from the oven after it reaches the correct temperature, and let it sit for at least 20 minutes to let the temperature stabilize. If you give the Chicken some time to rest after cooking, it will be more soft and juicy. Keep the Chicken warm by covering it with aluminum foil.
4. Serving Suggestions
Carving the Chicken: After resting, it’s time to carve the Chicken. Use a sharp knife and a carving fork to separate the legs, thighs, wings, and breasts. Be sure to save any accumulated juices in the Dutch oven to use for gravy or drizzling over the Chicken.
Gravy (optional): Place the Dutch oven with the pan dripping over low heat to make a simple gravy. To make the sauce thicker, add some flour and stir it in. Chicken broth or wine can be added for additional taste.
Side Dish Ideas: Roast vegetables, mashed potatoes, or a fresh green salad make excellent side dishes to accompany your roasted Chicken. Consider Ree Drummond’s comfort food style and serve with your family’s favorite sides.
5. Tips and Tricks
Choosing the Right Dutch Oven: Ensure your Dutch oven is large enough to accommodate the Chicken with some space around it comfortably. A 5-6 quart Dutch oven is typically suitable for roasting a whole chicken.
Temperature and Timing: Keep a close eye on the internal temperature of the Chicken and adjust the cooking time as needed. It’s essential to reach 165°F (74°C) for safety reasons.
Flavor Variations: Get creative with your seasonings and aromatics. You can experiment with different herbs, spices, citrus fruits, or even marinades to customize the flavor of your roasted Chicken.
Safety Precautions: Always handle raw Chicken with care and follow proper food safety guidelines. After working with raw poultry, be sure to disinfect your hands, cooking equipment, and any other surfaces you touch.
Following the Pioneer Woman’s approach, roasting a chicken in a Dutch oven is a beautiful way to create a mouthwatering and memorable meal for your family and friends. The Dutch oven’s ability to deliver even heat and retain moisture ensures that your Chicken will be tender, juicy, and full of flavor.
You can confidently re-create Ree Drummond’s delectable roasted Chicken by adhering to the procedures provided in this guide. Remember to personalize the recipe by adding your favorite herbs and aromatics, and remember to serve it alongside some comforting side dishes for a truly satisfying meal.
So, roll up your sleeves, preheat that oven, and embark on a culinary adventure inspired by the Pioneer Woman herself. Your Dutch oven-roasted Chicken will undoubtedly become a family favorite, perfect for any occasion or a cozy weeknight dinner. Enjoy!